
Unreal Engine 4.27 Android setup and fixing errors
 Unfortunately, the official guide for setting up Android builds in UE4.27 is outdated, and if you follow it exactly, you will encounter the following errors:
- Could not determine the dependencies of task ‘:app:compileDebugJavaWithJavac’.
- Installed Build Tools revision 34.0.0 is corrupted. Remove and install again using the SDK Manager.
- ERROR: cmd.exe failed with args /c “C:\PeloGetan\ProjectName\Intermediate\Android\armv7\gradle\rungradle.bat” :app:assembleDebug.
I spent a lot of time trying to fix these and many subsequent errors. That’s why I wrote this guide, in which I will explain in detail what and where you need to click to avoid breaking anything.
If you followed the official guide precisely and haven’t done anything else yet
At the moment, the solution is quite simple and quick:
1. Open the folder located at: “C:\Users\user\AppData\Local\Android\Sdk\build-tools\34.0.0”.
2. Rename the file “d8.bat” to “dx.bat”.
3. In the same folder, open the “lib” folder and rename the file “d8.jar” to “dx.jar”.
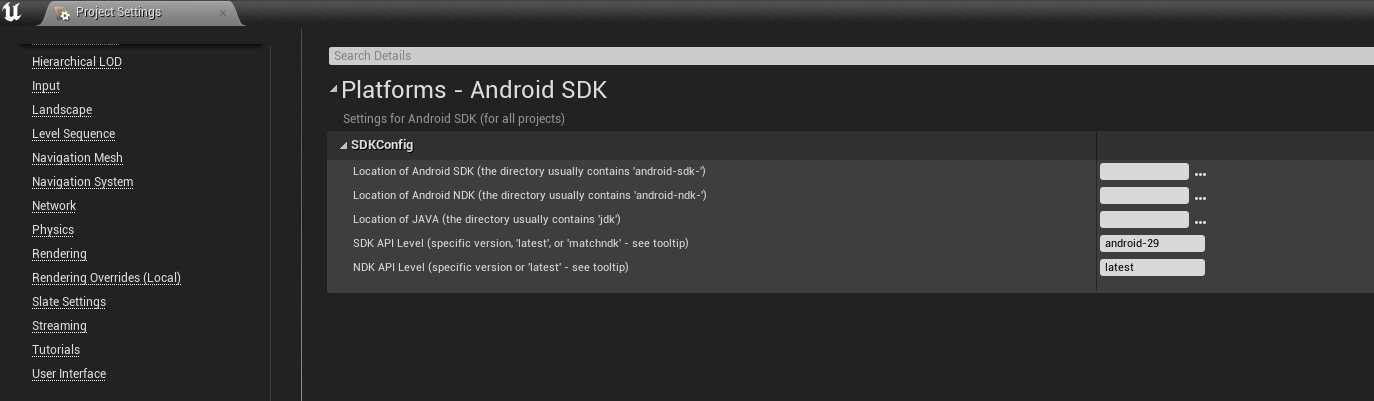
4. Launch the engine and open the Edit->Project Settings tab in the left menu of the window look for Android SDK, in the “SDK API Level” field and enter “android-29”.
Launch the engine and try to build for Android, everything should work. If you encounter the same or a new error, it means there was a deviation from the official guide somewhere, continue reading.
If you’ve already installed Android Studio and tried to make changes in it
Unreal Engine is quite sensitive when it comes to configuring SDK and NDK. A slight misstep to the left or right, and you’ll get a hundred errors during compilation. Therefore, first, if you’ve used the official or, heaven forbid, an unofficial guide, you need to start from scratch. This is important!
1. Uninstall Android Studio from your PC via the control panel.
2. Delete the following folders:
- C:\Program Files\Android
- C:\Users\user.android
- C:\Users\user.gradle
- C:\Users\user\AppData\Local\Android
- C:[Your UE4 project]\Build\
- C:[Your UE4 project]\Intermediate\
- C:[Your UE4 project]\DerivedDataCache
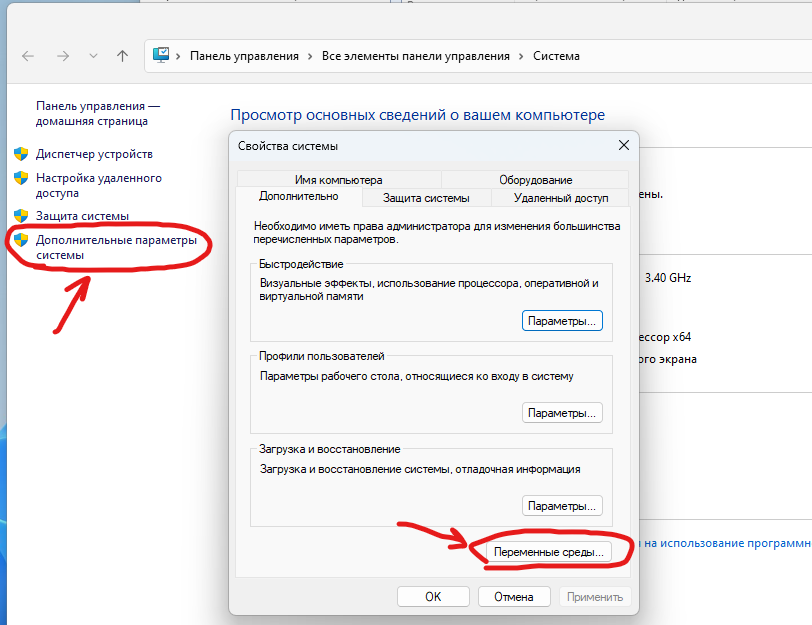
3. Open “This PC”, right-click in the empty space inside the window, and select “Properties”.

4. In the opened window, select “Advanced system settings”->“Environment Variables”
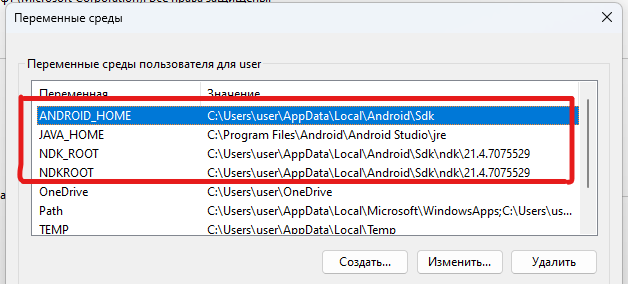
5. Delete the following environment variables:
- ANDROID_HOME
- JAVA_HOME
- NDK_ROOT
- NDRROOT
4. Restart your PC.
Hooray, we’ve gotten rid of the remnants of previous attempts.
Installing Android Studio 4 and Configuration
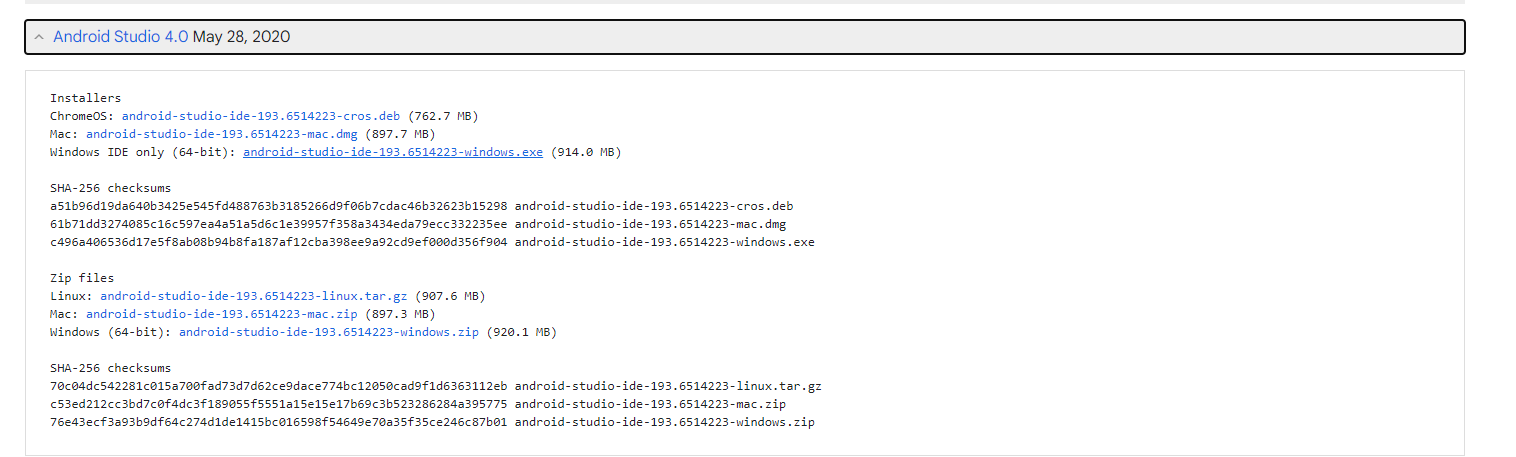
In the official guide, Epic Games asks you to install “Android Studio 4.0”, so that’s what we’ll do. You can download it from the official website, You need Android Studio 4.0 May 28, 2020.
 1. Run the installer. Leave everything as it is on all steps.
2. Launch Android Studio. Again, leave everything as it is on all steps.
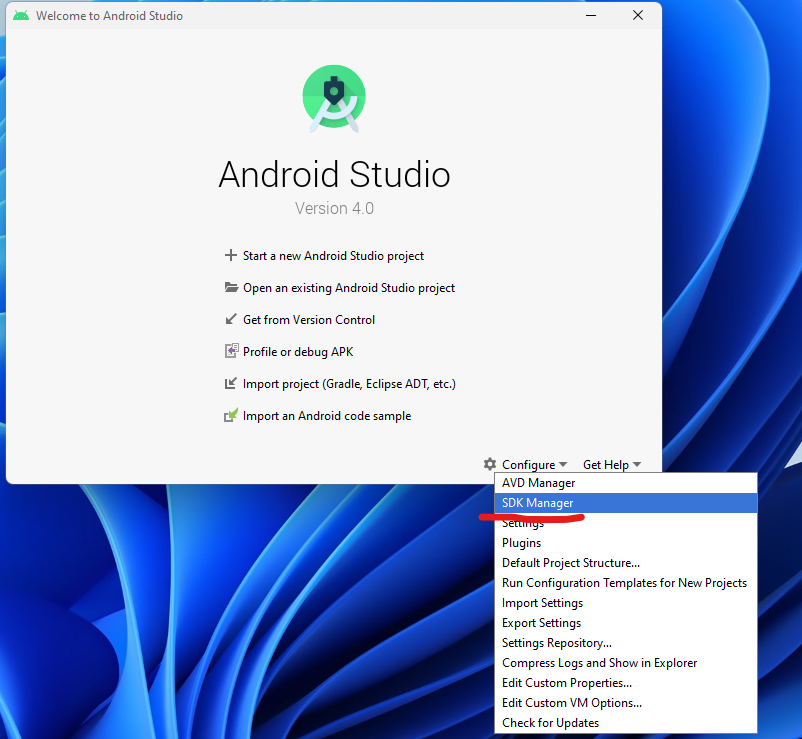
3. When the setup is complete and Android Studio is running, click Configure->SDK Manager.
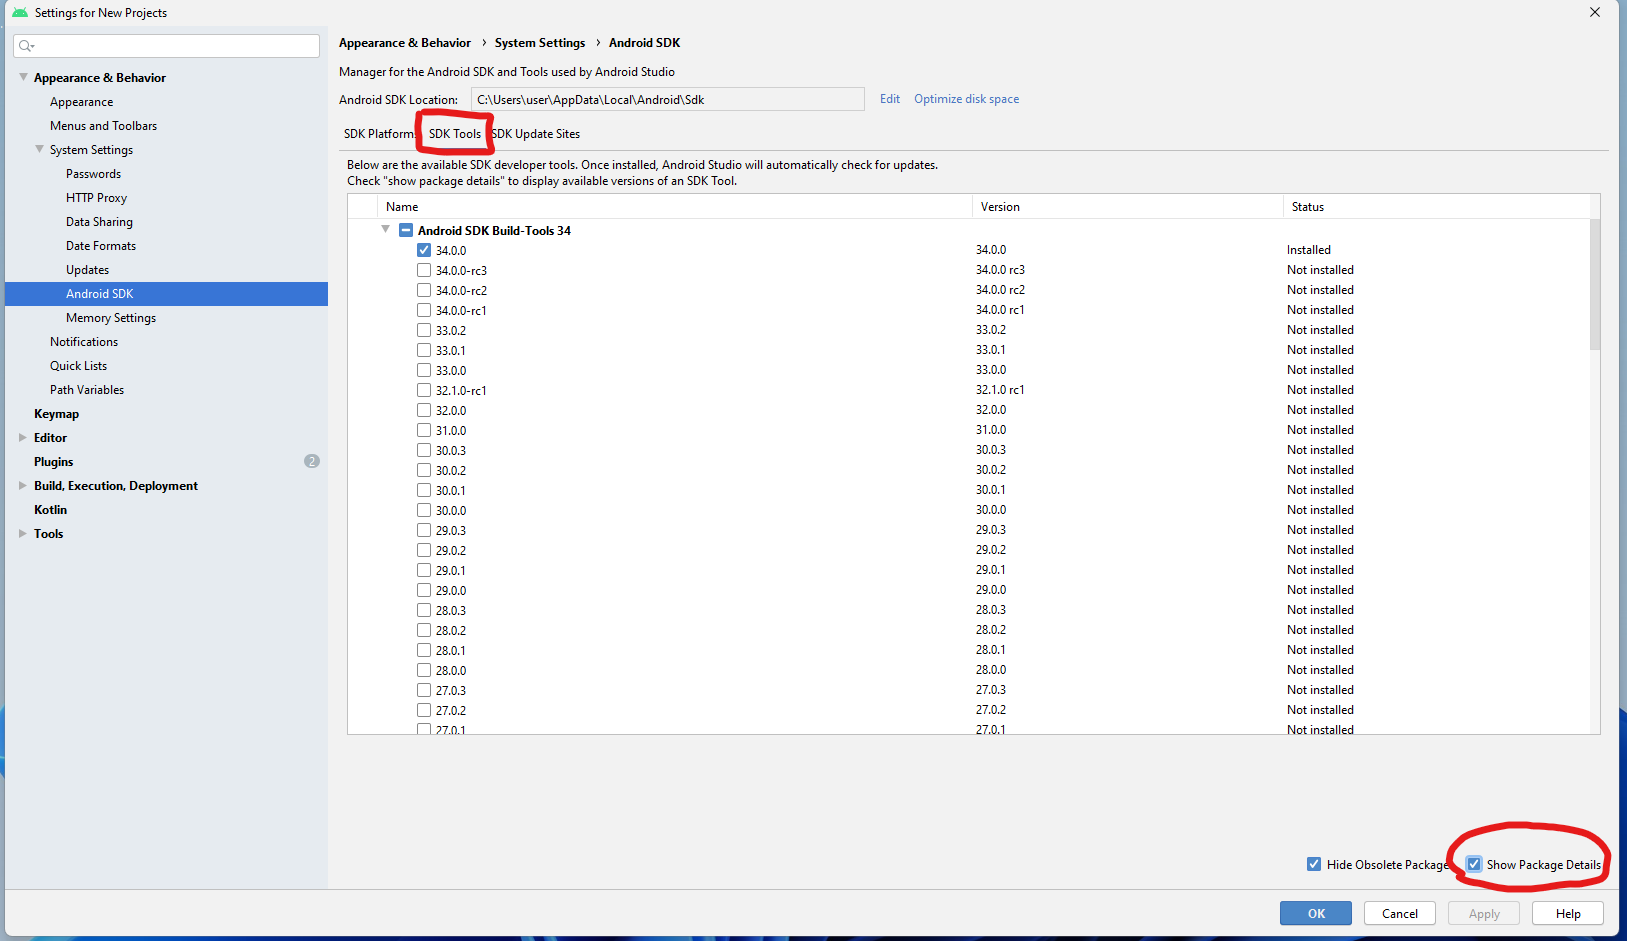
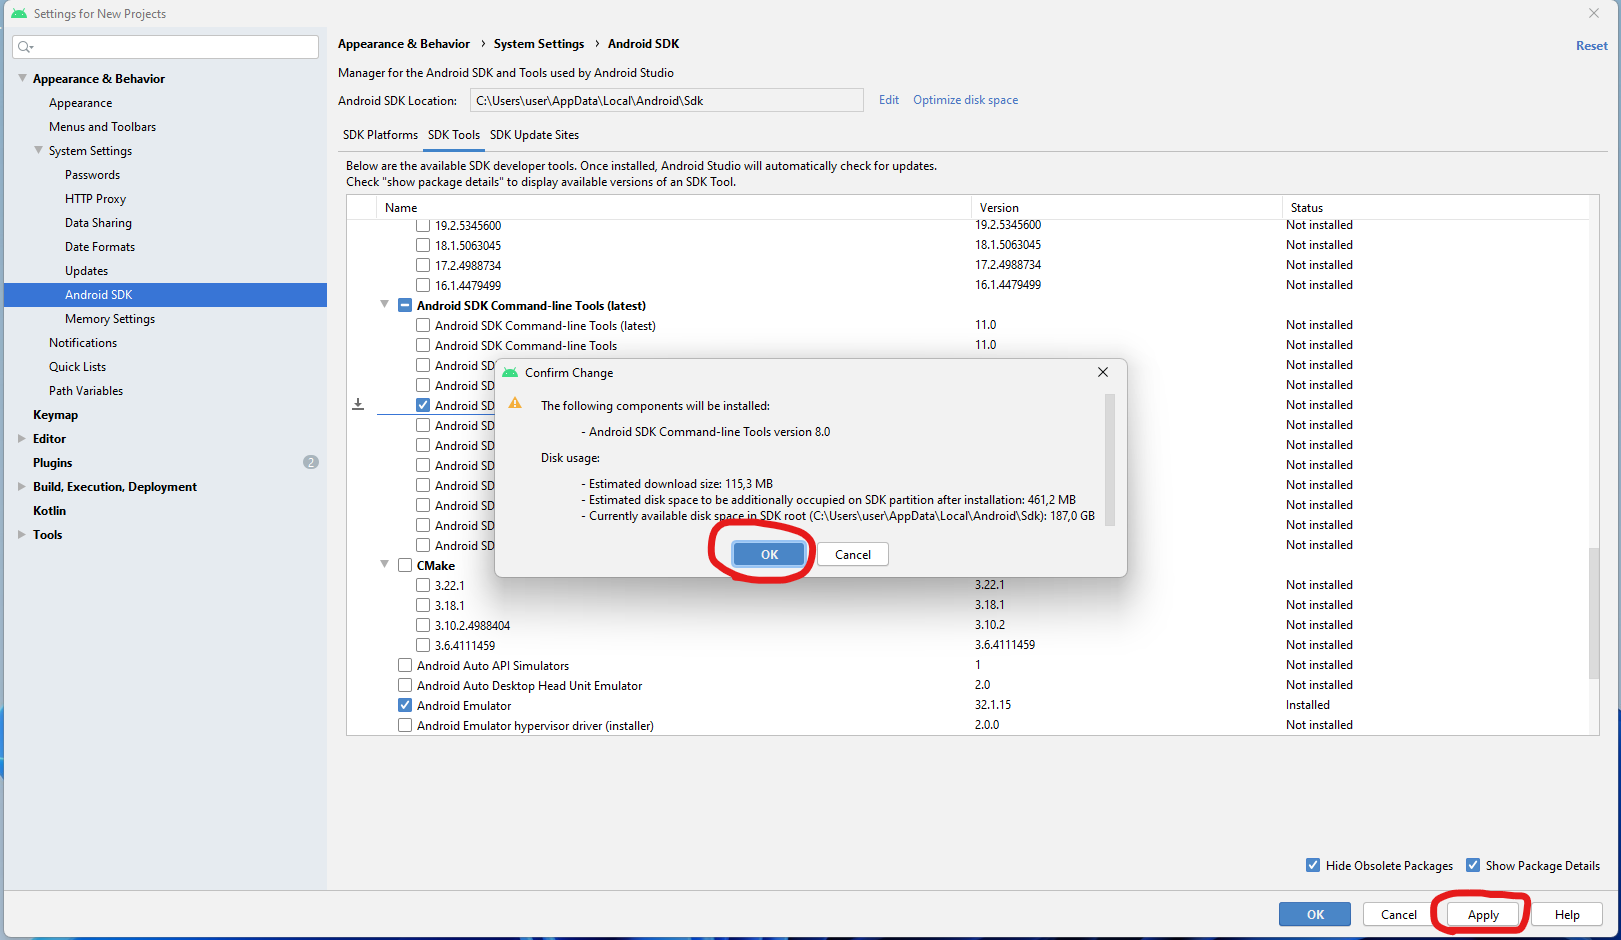
4. Open the SDK Toolstab and check the box next to Show Package Details.
5. Look for “Android SDK Command-line Tools 8.0” in the list and select it.
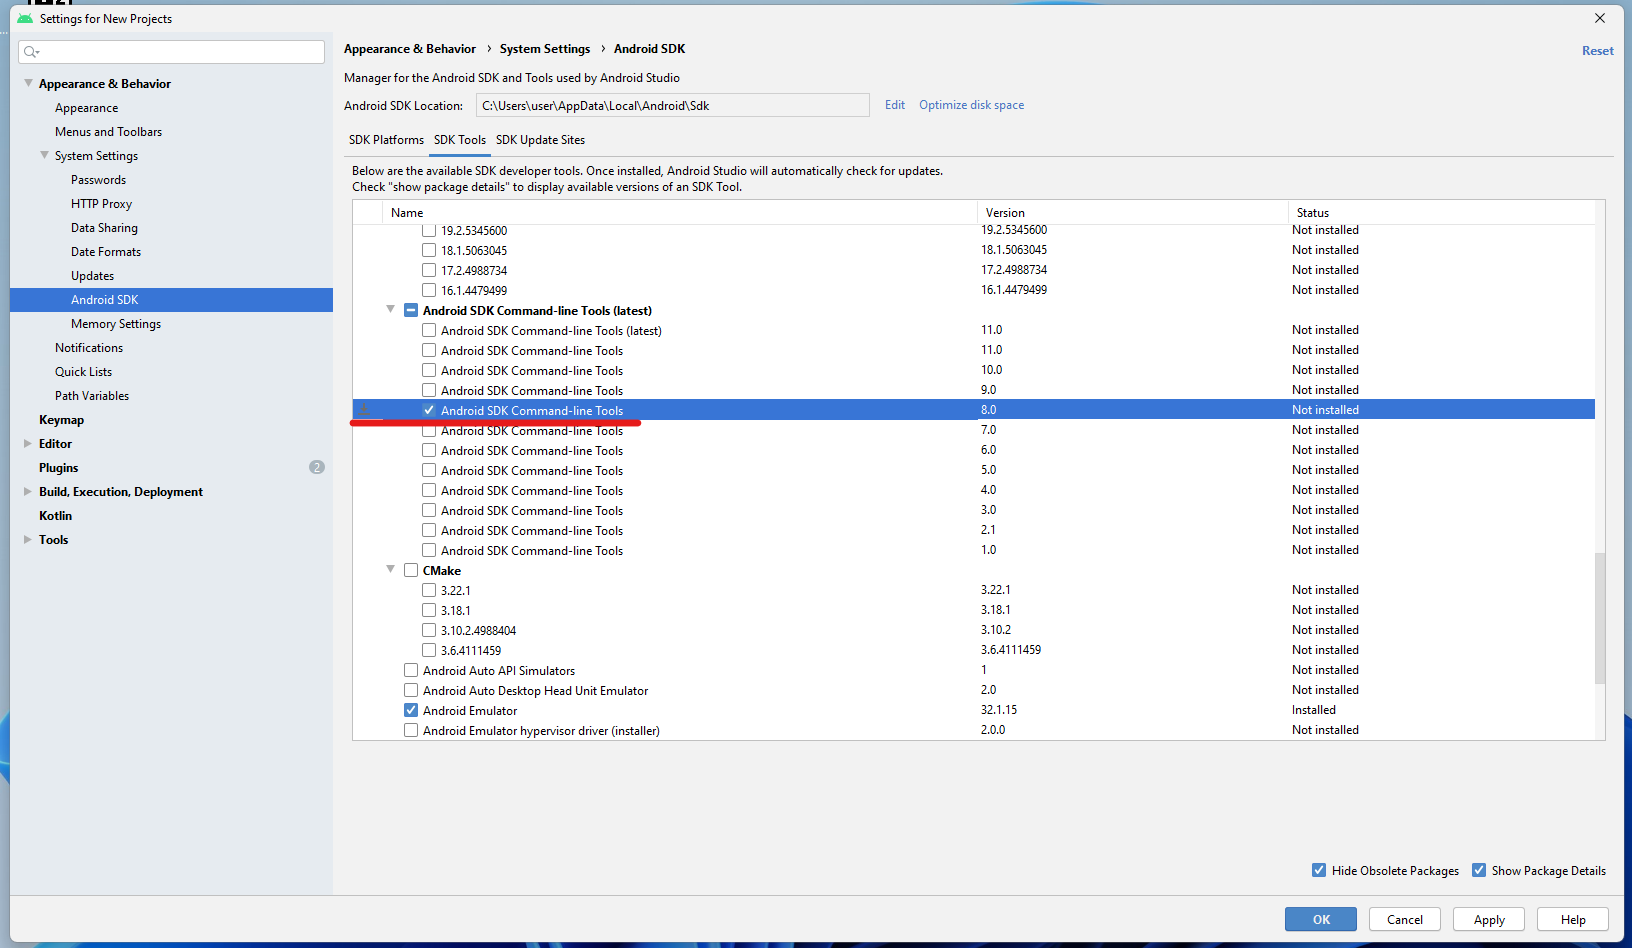
6. Click Apply->OK->Accept and wait for the installation to complete.
7. When the installation is finished, click Finish and close the studio; you won’t need it anymore.
8. Now you need to go to the engine’s folder, in my case, it’s “C:\UE4.27\UnrealEngine\Engine\Extras\Android”. Here, you’ll need one of the SetupAndroid files, choose the one that corresponds to your OS (SetupAndroid.bat for Windows, SetupAndroid.command for Mac, and SetupAndroid.sh for Linux).

9. Next, perform one of the following actions depending on the file:
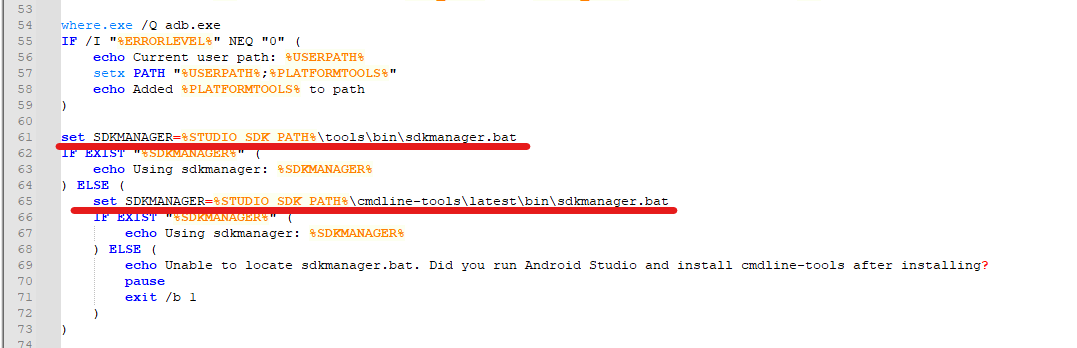
- SetupAndroid.bat, change all lines with “SDKMANAGER=” to “SDKMANAGER=%STUDIO_SDK_PATH%\cmdline-tools\8.0\bin\sdkmanager.bat”
- SetupAndroid.command or SetupAndroid.sh, change all lines with “SDKMANAGERPATH=” to “SDKMANAGERPATH=”$STUDIO_SDK_PATH/cmdline-tools/8.0/bin”“
Essentially, there are only two lines like this, and they are close together.

10. Run the modified file and wait for the progress to complete successfully.

11. Open the folder located at: “C:\Users\user\AppData\Local\Android\Sdk\build-tools\34.0.0”.
12. Rename the file “d8.bat” to “dx.bat”.
13. In the same folder, open the “lib” folder and rename the file “d8.jar” to “dx.jar”.
14. Restart your PC.
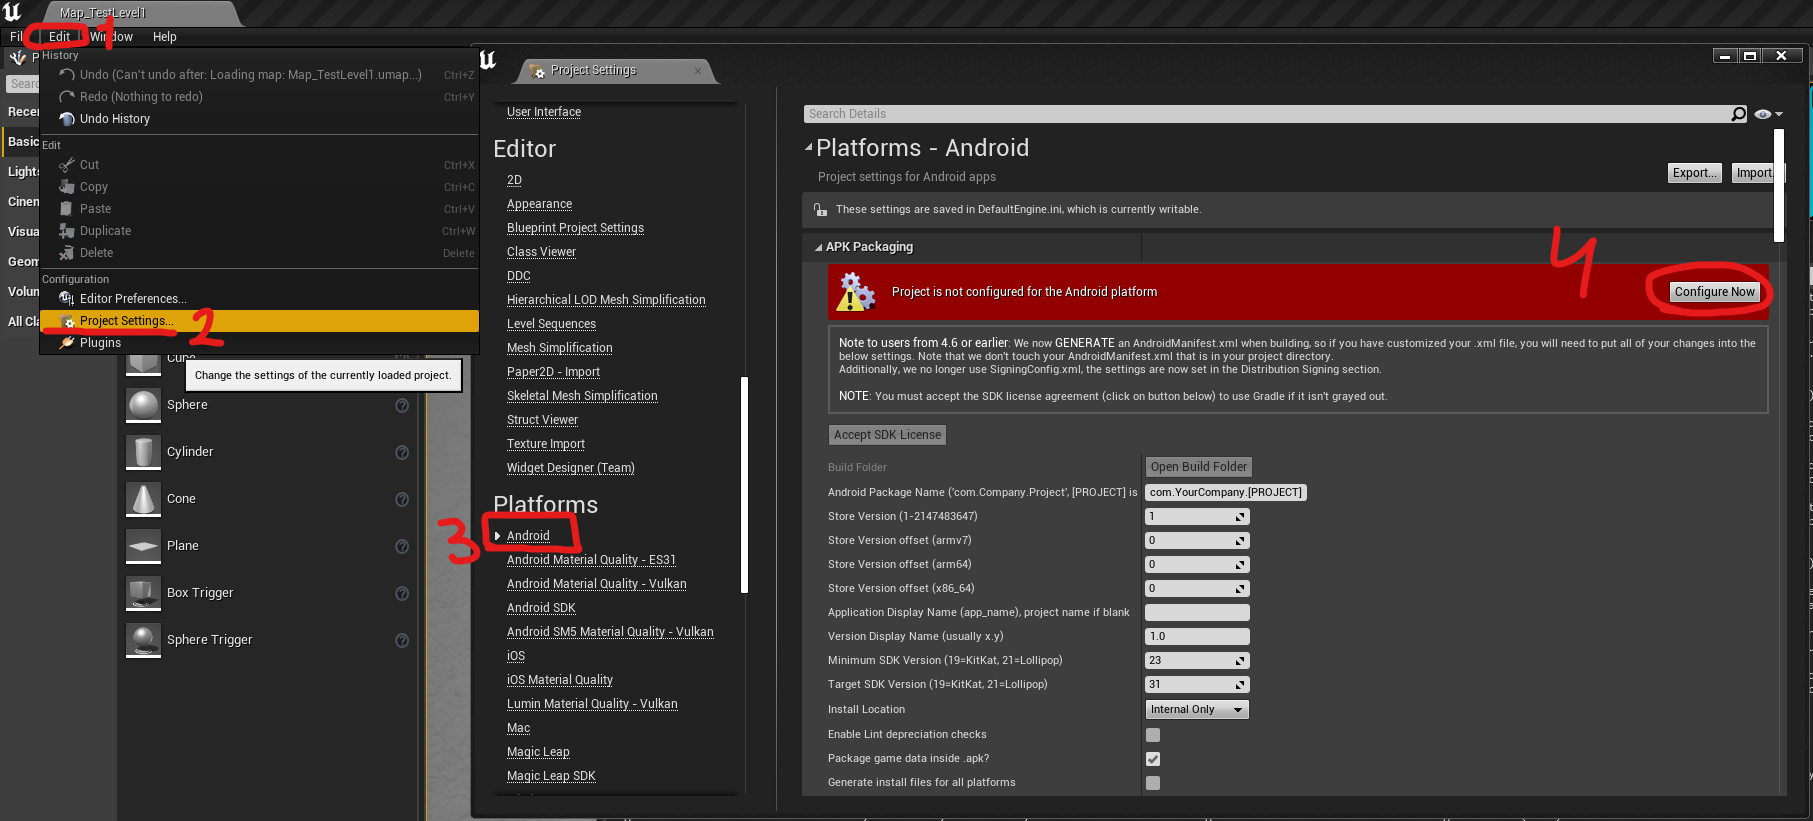
15. Launch the engine, open the Edit->Project Settings tab in the left menu of the window and look for Android. In the right menu, click Configure Now, if you haven’t done it earlier.
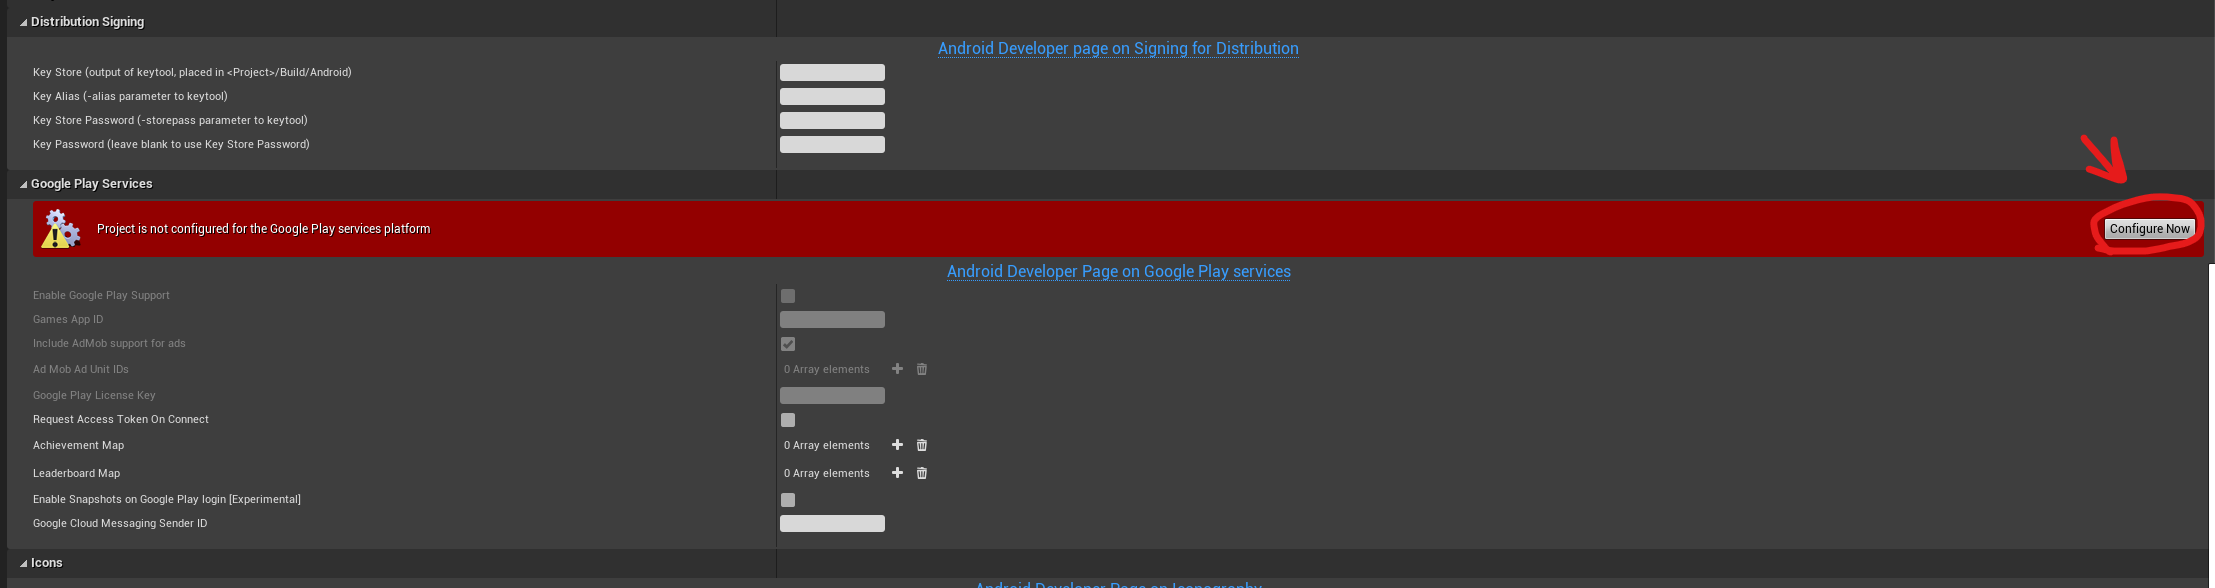
16. Scroll down to Google Play Services, and here, click Configure Now as well.
17. In the left menu, find Android SDK. In the “SDK API Level” field, enter “android-29”.
18. Start building for Android. If you followed the instructions, you shouldn’t encounter any errors.
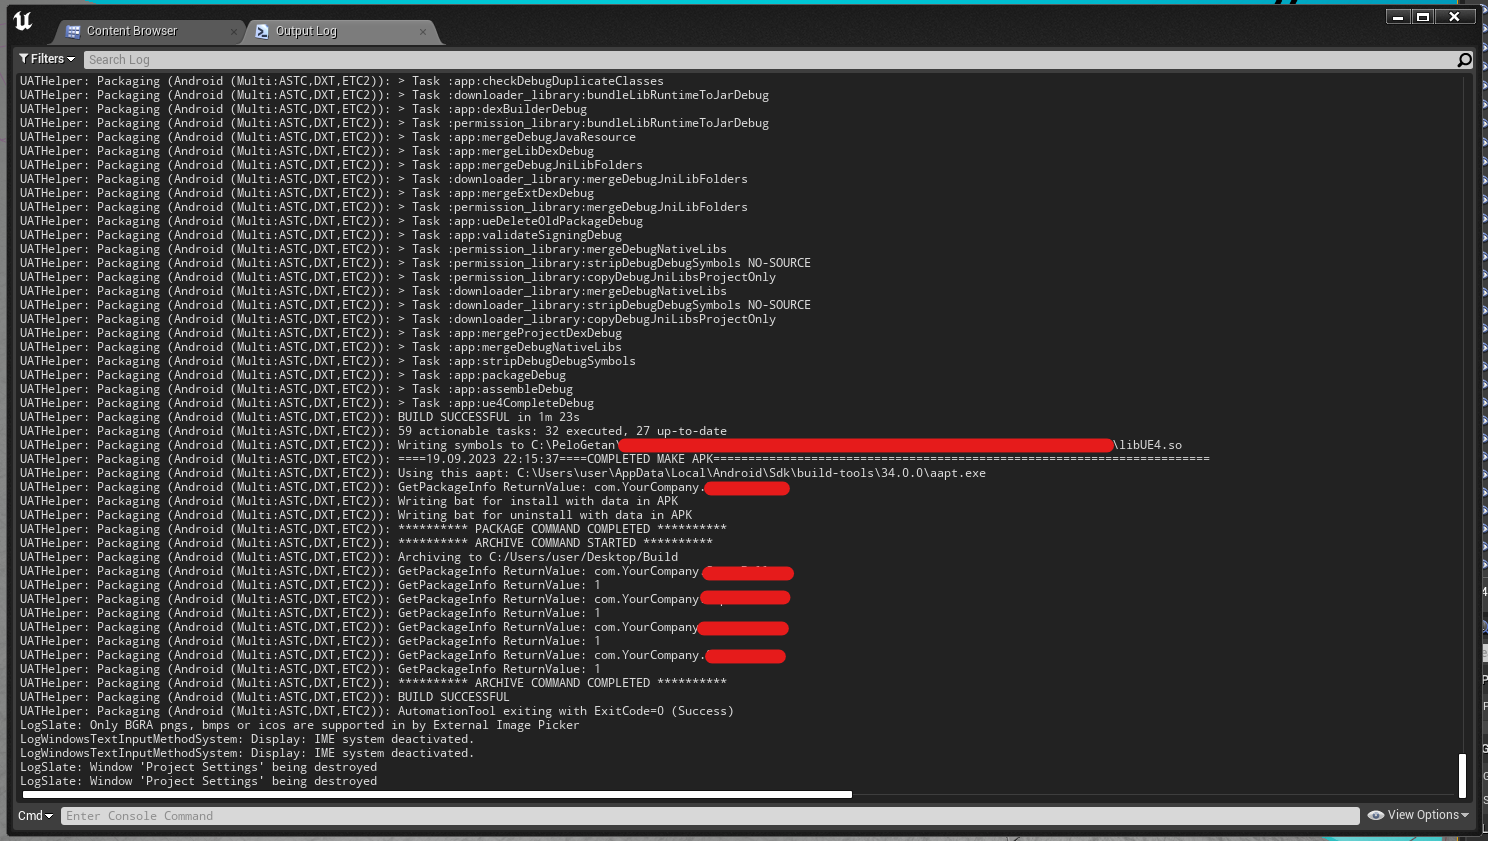
If an error occurs unexpectedly
It may happen that at some point during the build, an error appears, and reading the log doesn’t provide a clear understanding of the issue. In that case, repeat this step:
Delete the following folders:
- C:\Users\user.gradle
- C:[Your UE4 project]\Build\
- C:[Your UE4 project]\Intermediate\
- C:[Your UE4 project]\DerivedDataCache
Run Unreal Engine and try to build.
If this doesn’t help, return to the beginning of this guide and first uninstall and then reinstall Android Studio.
Conclusion
I sincerely hope that this post will help someone save time and nerves. Through trial and error, I managed to achieve stable operation of UE4.27 with Android and couldn’t help but share this information since I couldn’t find it anywhere myself.