
UE Slate lesson 2
This is the second lesson on Slate, where we will start creating an inventory system using this framework.
Inventory and Items
Before proceeding with the creation of the UI cell, you need to write the code that it will visualize. I will develop the inventory system gradually, adding new functionality in each lesson. In this lesson, I will write only the parts necessary for displaying information in the cell.
Let’s create the InventoryComponent.h and InventoryComponent.cpp files:
InventoryComponent.h
#pragma once
#include "CoreMinimal.h"
#include "Components/ActorComponent.h"
#include "InventoryComponent.generated.h"

UCLASS(Blueprintable, BlueprintType)
class LEARNSLATE_API AItem : public AActor
{
	GENERATED_BODY()
public:
	UPROPERTY(EditAnywhere, BlueprintReadOnly, Category = "Item")
	FSlateBrush ItemIcon;
};

USTRUCT(BlueprintType)
struct FInventoryItem
{
	GENERATED_BODY()
public:
	UPROPERTY(EditAnywhere, BlueprintReadWrite, Category = "Item")
	TSubclassOf<AItem> ItemClass;

	UPROPERTY(EditAnywhere, BlueprintReadWrite, Category = "Item")
	int32 Count;

	FInventoryItem()
	{
		ItemClass = nullptr;
		Count = -1;
	}

	FInventoryItem(TSubclassOf<AItem> aItemClass, int32 aCount)
	{
		ItemClass = aItemClass;
		Count = aCount;
	}
};

UCLASS(Blueprintable, BlueprintType, meta = (BlueprintSpawnableComponent))
class LEARNSLATE_API UInventoryComponent : public UActorComponent
{
	GENERATED_BODY()
public:
	virtual void BeginPlay() override;

	UPROPERTY(EditAnywhere, BlueprintReadWrite, Category = "Item")
	int32 InventorySizeX = 3;
	UPROPERTY(EditAnywhere, BlueprintReadWrite, Category = "Item")
	int32 InventorySizeY = 3;
	TArray<FInventoryItem>& GetItems() { return Items; }

protected:
	UPROPERTY(EditAnywhere, BlueprintReadWrite, Category = "Item")
	TArray<FInventoryItem> Items;
};
InventoryComponent.cpp
#include "InventoryComponent.h"

void UInventoryComponent::BeginPlay()
{
	Super::BeginPlay();
	for(int32 i = Items.Num(); i < InventorySizeX * InventorySizeY; i++)
	{
		Items.Add(FInventoryItem());
	}
}
In this code, we add the AItem class, which represents an item class and currently only holds the icon, the FInventoryItem structure, which contains information about the item class and its quantity, and the UInventoryComponent inventory system, which uses the FInventoryItem structure to store items. In BeginPlay, we create empty slots for items. These slots are part of the inventory system, and we will talk about them in the following lessons.
Now we need to add this component to our Character class. Open “your_project_name_Character.h” and add the following code:
public:
	UPROPERTY(EditAnywhere, BlueprintReadOnly, Category = "Inventory")
	class UInventoryComponent* InventoryComponent;
In the .cpp file, in the Character constructor, we create the component and assign it to our variable:
InventoryComponent = CreateDefaultSubobject<UInventoryComponent>(TEXT("InventoryComponent"));
Inventory Cell
It is clear that the inventory will consist of cells, essentially, we will create only one cell and duplicate it as many times as needed.
The cell will contain the following information:
- Icon
- Quantity
Now we need to add the “UMG” module to the PublicDependencyModuleNames field in the your_project_name.Build.cs file, and it will look something like this:
PublicDependencyModuleNames.AddRange(new string[] { "Core", "CoreUObject", "Engine", "InputCore", "HeadMountedDisplay", "UMG" });
This is necessary because in this lesson we will start working with new user interface classes. Let’s create two new files, ItemSlotWidget.cpp and ItemSlotWidget.h:
ItemSlotWidget.h
#pragma once
#include "CoreMinimal.h"

struct FInventoryItem;

class LEARNSLATE_API SItemSlotWidget : public SCompoundWidget
{
public:
	SLATE_BEGIN_ARGS(SItemSlotWidget) {}
	SLATE_ARGUMENT(FInventoryItem*, Item)
	SLATE_END_ARGS()

	FInventoryItem* Item;

	void Construct(const FArguments& InArgs);
	const FSlateBrush* GetItemIcon() const;
	FText GetItemCount() const;
};
The .h file doesn’t bring anything new except the SLATE_ARGUMENT(FInventoryItem*, Item) argument, which allows us to pass a pointer to the Item into the widget.
ItemSlotWidget.cpp
void SItemSlotWidget::Construct(const FArguments& InArgs)
{
	Item = InArgs._Item;

	ChildSlot
	[
		SNew(SBox)
		.WidthOverride(110)
		.HeightOverride(110)
		[
			SNew(SOverlay)
			+ SOverlay::Slot()
			.HAlign(HAlign_Fill)
			.VAlign(VAlign_Fill)
			[
				SNew(SImage)
				.Image(FCoreStyle::Get().GetBrush("BlackBrush")) // Slot background
			]
			+ SOverlay::Slot()
			.HAlign(HAlign_Center)
			.VAlign(VAlign_Center)
			[
				SNew(SBox)
				.WidthOverride(100)
				.HeightOverride(100)
				[
					SNew(SOverlay)
					+ SOverlay::Slot()
					.HAlign(HAlign_Fill)
					.VAlign(VAlign_Fill)
					[
						SNew(SImage)
						.Image(FCoreStyle::Get().GetBrush("WhiteBrush")) // Item background
				  ]
					+ SOverlay::Slot()
					.HAlign(HAlign_Center)
					.VAlign(VAlign_Center)
					[
						SNew(SImage)
						.Image(this, &SItemSlotWidget::GetItemIcon) // Item icon
					]
					+ SOverlay::Slot()
					.HAlign(HAlign_Right)
					.VAlign(VAlign_Bottom)
					[
						SNew(STextBlock)
						.Text(this, &SItemSlotWidget::GetItemCount) // Item count
						.ColorAndOpacity(FSlateColor(FLinearColor::Black))
						.Font(FSlateFontInfo(FPaths::EngineContentDir() / TEXT("Slate/Fonts/Roboto-Regular.ttf"), 24))
					]
				]
			]
		]
	];
}

const FSlateBrush* SItemSlotWidget::GetItemIcon() const
{
	if(Item && Item->ItemClass)
	{
		return &Item->ItemClass.GetDefaultObject()->ItemIcon;
	}
	return FCoreStyle::Get().GetBrush("WhiteBrush");
}

FText SItemSlotWidget::GetItemCount() const
{
	if(Item && Item->ItemClass)
	{
		return FText::FromString(FString::FromInt(Item->Count));
	}
	return FText::FromString("");
}
The .cpp file has grown significantly compared to the previous lesson. Although it has become larger, there is nothing complicated about it. Here’s how it’s structured:
- A black background of size 110x110 that serves as the cell frame.
- A white background of size 100x100 that serves as the cell’s background.
- The item icon.
- The text displaying the item count.
Additionally, there are two functions that retrieve information from the item: GetItemIcon() and GetItemCount().
Inventory Panel
Now that we have a cell, we need to create a widget that will be duplicated as many times as needed to display the entire inventory. Let’s create two files: WInventoryMainBar.h and WInventoryMainBar.cpp.
WInventoryMainBar.h
#pragma once

#include "CoreMinimal.h"
#include "Components/Widget.h"
#include "WInventoryMainBar.generated.h"

class LEARNSLATE_API SInventoryMainBar : public SCompoundWidget
{
public:
	SLATE_BEGIN_ARGS(SInventoryMainBar) {}
	SLATE_ARGUMENT(TWeakObjectPtr<class UInventoryComponent>, Inventory)
	SLATE_END_ARGS()

	void Construct(const FArguments& InArgs);
	TWeakObjectPtr<class UInventoryComponent> Inventory;
	TArray<TSharedPtr<class SItemSlotWidget>> MainInventoryItemsWidgets;
};

UCLASS(Blueprintable, BlueprintType)
class LEARNSLATE_API UWInventoryMainBar : public UWidget
{
	GENERATED_BODY()
public:
	virtual void ReleaseSlateResources(bool bReleaseChildren) override;

	UPROPERTY(EditAnywhere, BlueprintReadWrite, Meta = (ExposeOnSpawn = true), Category = "InventoryMainBar")
	class UInventoryComponent* InventoryComponent;

	virtual const FText GetPaletteCategory() override;
protected:
	virtual TSharedRef<SWidget> RebuildWidget() override;
	TSharedPtr<SInventoryMainBar> InventoryMainBarWidget;
};
The .h file introduces a new UWidget class, which can be called a bridge between pure C++ Slate and Blueprint Widgets. UWidget is a descendant of UVisual, which in turn inherits from UObject. This is good news for us because now we have access to all of its functionality. Moreover, UWidget can be added directly to the Blueprint widget in the editor, allowing us to design these elements by dragging them with the mouse in the editor, rather than writing them in a file.
Functions:
- virtual void ReleaseSlateResources(bool bReleaseChildren) is needed to clean up our Slate widget from memory.
- virtual const FText GetPaletteCategory() allows us to set a category for this widget, which will help us find it later in the Blueprint widget.
- virtual TSharedRef/
RebuildWidget() creates the Slate widget.
WInventoryMainBar.cpp
#include "WInventoryMainBar.h"
#include "InventoryComponent.h"
#include "ItemSlotWidget.h"
#include "Widgets/Layout/SGridPanel.h"

void SInventoryMainBar::Construct(const FArguments& InArgs)
{
	Inventory = InArgs._Inventory;

	TSharedPtr<SGridPanel> GridPanel;
	ChildSlot
	.HAlign(HAlign_Left)
	.VAlign(VAlign_Center)
	[
			SAssignNew(GridPanel, SGridPanel)
	];

	int32 SlotsCountX = Inventory.IsValid() ? Inventory->InventorySizeX : 3;
	int32 SlotsCountY = Inventory.IsValid() ? Inventory->InventorySizeY : 3;
	int32 Counter = 0;
	for (int32 x = 0; x < SlotsCountX; x++)
	{
		for (int32 y = 0; y < SlotsCountY; y++)
		{
			TSharedPtr<SItemSlotWidget> NewWidget;
			GridPanel->AddSlot(y, x).Padding(10)
			[
				SAssignNew(NewWidget, SItemSlotWidget)
				.Item(Inventory.IsValid() ? &Inventory->GetItems()[Counter] : nullptr)
			];
			MainInventoryItemsWidgets.Add(NewWidget);
			Counter++;
		}
	}
}

void UWInventoryMainBar::ReleaseSlateResources(bool bReleaseChildren)
{
	InventoryMainBarWidget.Reset();
}

TSharedRef<SWidget> UWInventoryMainBar::RebuildWidget()
{
	APlayerController * Controller = GetOwningPlayer();
	if(Controller)
	{
		APawn * Pawn = Controller->GetPawn();
		if(Pawn)
		{
			InventoryComponent = Pawn->FindComponentByClass<UInventoryComponent>();
		}
	}

	InventoryMainBarWidget = SNew(SInventoryMainBar).Inventory(InventoryComponent);
	return InventoryMainBarWidget.ToSharedRef();
}

const FText UWInventoryMainBar::GetPaletteCategory()
{
	return FText::FromString("Inventory");
}
In the .cpp file, pay attention to the void SInventoryMainBar::Construct(const FArguments& InArgs) function:
Since we need to create the required number of cells in a loop, the GridPanel is created in advance, and it’s important to assign it to a variable inside ChildSlot. Next comes the important check for the validity of the inventory pointer because during widget setup in the editor, the inventory does not exist!
We then loop through the GridPanel to add inventory cells and assign them pointers to the inventory item structures they will display, again checking the inventory’s validity. If the inventory is invalid, the cell is assigned nullptr.
Next, our UWidget class UWInventoryMainBar. The functions ReleaseSlateResources() and GetPaletteCategory() are quite simple, so let’s move on to RebuildWidget():
Our goal here is to create a Slate widget and pass it a pointer to the inventory, so we try to retrieve it from the player’s Pawn. If we do not retrieve the inventory, which will certainly happen during the setup of the Blueprint widget, the Slate widget will be created with a null pointer to the inventory, which we accounted for by performing checks for this.
Now we have a widget that can be added to the Blueprint widget, but to gain full control over it in the code, it’s better to create it in the code. We need the UUserWidget class.
Let’s create the UWMain.h file:
UWMain.h
#pragma once
#include "CoreMinimal.h"
#include "Blueprint/UserWidget.h"
#include "UWMain.generated.h"

class UCanvasPanel;
class UWInventoryMainBar;

UCLASS(Blueprintable, BlueprintType)
class LEARNSLATE_API UWMain : public UUserWidget
{
	GENERATED_BODY()
public:

	UPROPERTY(BlueprintReadOnly, Category = "UWMain", meta=(BindWidget))
	UCanvasPanel* RootWidget;
	UPROPERTY(BlueprintReadOnly, Category = "UWMain", meta=(BindWidget))
	UWInventoryMainBar* InventoryMainBar;
};
This file is small and, besides the class itself, contains two pointers: UCanvasPanel RootWidget and UWInventoryMainBar InventoryMainBar. The most important part here is the meta=(BindWidget) in UPROPERTY. This meta information works as follows: in the Blueprint widget, there must be a child widget that has a pointer, otherwise the Blueprint will not compile and will throw an error. This guarantees that we will not encounter a situation where we reference a widget through a pointer, but it turns out to be nullptr. In our case, we are required to add a UCanvasPanel widget named RootWidget and a UWInventoryMainBar widget named InventoryMainBar to the Blueprint widget.
HUD Code Changes
Now we need to add this widget to the HUD, so we will slightly modify the MyHUD.h and MyHUD.cpp code:
MyHUD.h
#pragma once

#include "CoreMinimal.h"
#include "GameFramework/HUD.h"
#include "MyHUD.generated.h"

class UWMain;

UCLASS()
class LEARNSLATE_API AMyHUD : public AHUD
{
	GENERATED_BODY()

public:
	UPROPERTY(EditAnywhere, Category = "Widgets")
	TSubclassOf<UUserWidget> MainWidgetClass;

protected:
	virtual void BeginPlay() override;
	UWMain* MainWidget;
};
We have added a reference to our widget class.
MyHUD.cpp
#include "MyHUD.h"
#include "UWMain.h"
#include "Blueprint/UserWidget.h"

void AMyHUD::BeginPlay()
{
	Super::BeginPlay();
	MainWidget = CreateWidget<UWMain>(GetWorld(), MainWidgetClass);
	if(MainWidget)
	{
		MainWidget->AddToViewport();
	}
}
Here, at the beginning of the game, we create and add the widget to the screen.
Final Steps in Blueprints
Launch the engine. First, let’s create a child class of AItem so that we have an item to place in the inventory.
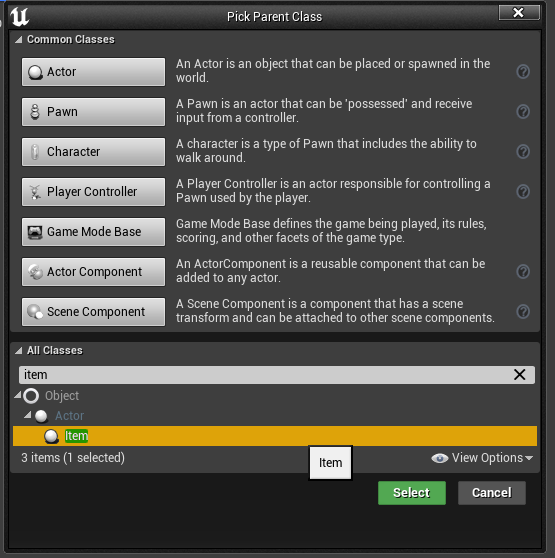
In this class, we change the image to any suitable one. I’m using an image from the engine: T_UE4Logo_Mask.

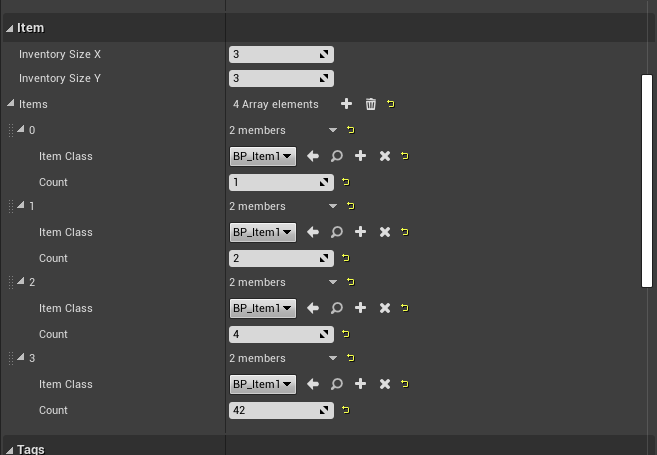
Now open our ThirdPersonCharacter, select InventoryComponent, and add our new class to the item array. You can choose any quantity, but the array should not contain more than 9 items, as that is the size of our inventory.
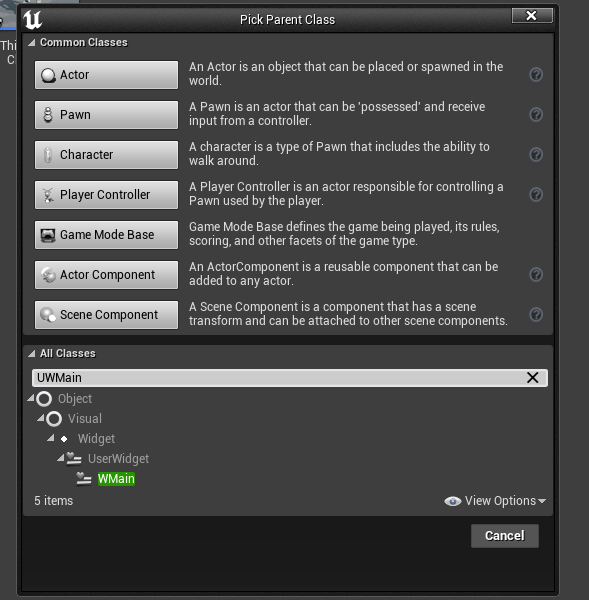
Next, create a child class of our widget UWMain and name it W_Main.
Upon opening the class, we see the errors I mentioned earlier:
A required widget binding "RootWidget" of type  Canvas Panel  was not found.
A required widget binding "InventoryMainBar" of type  WInventory Main Bar  was not found.
A required widget binding "RootWidget" of type  Canvas Panel  was not found.
A required widget binding "InventoryMainBar" of type  WInventory Main Bar  was not found.
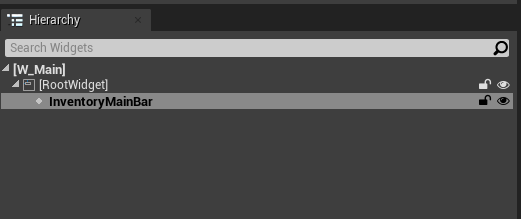
The widget will not compile until we add the corresponding widgets. Add a UCanvasPanel widget named RootWidget and a UWInventoryMainBar widget named InventoryMainBar.
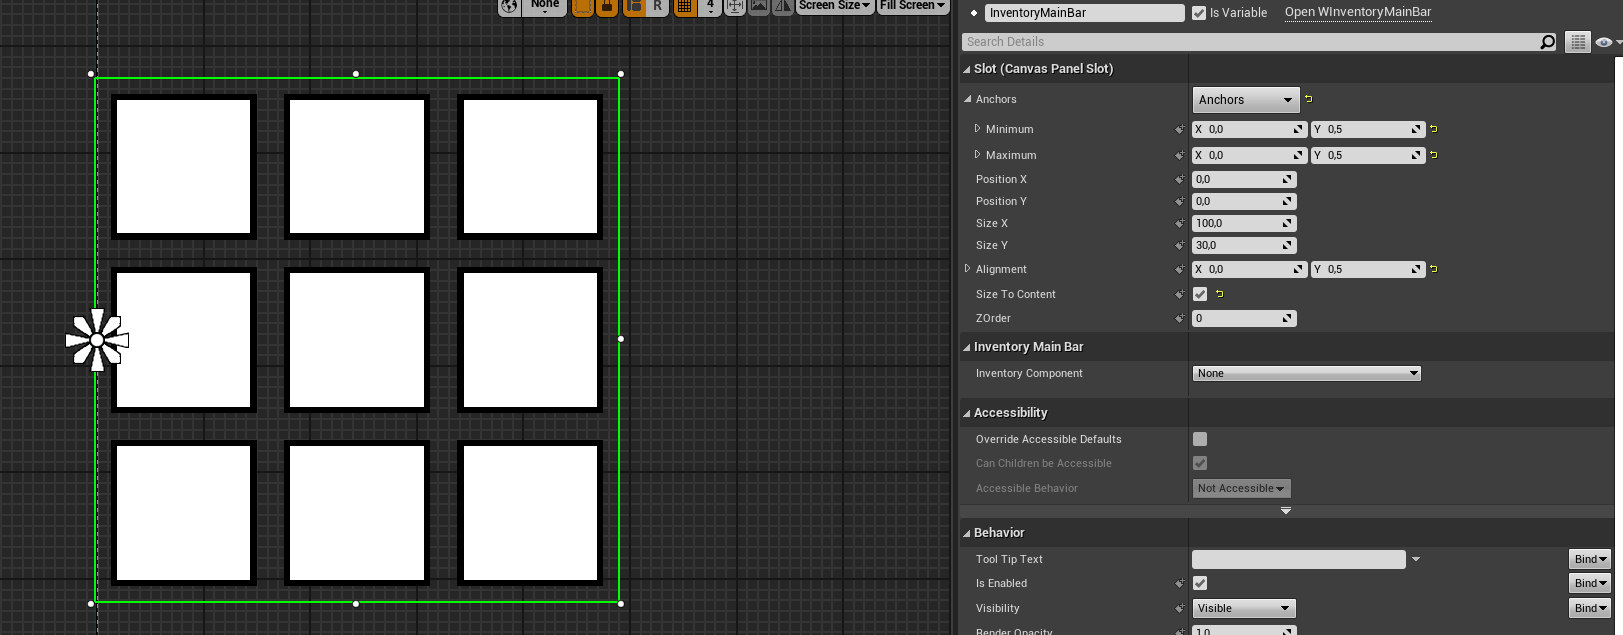
Additionally, I will slightly change the InventoryMainBar settings so that it is centered on the left edge of the screen. The settings are shown in the image below:
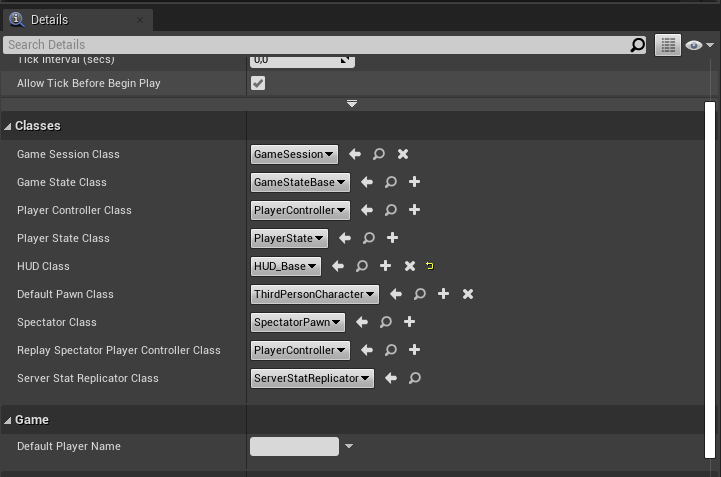
Now we need to create a child HUD class.
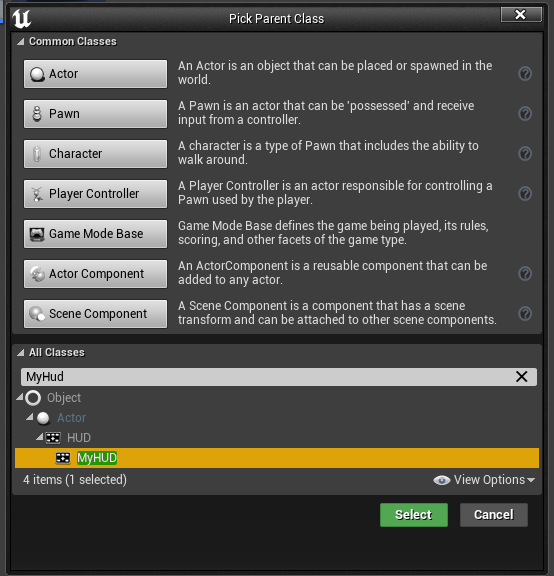
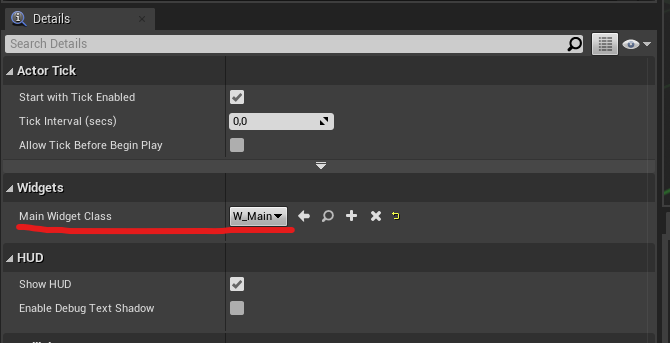
Name it HUD_Base and specify the UWMain widget class in it.
Finally, the last thing we need to do is create a child GameMode from the your_project_name_GameMode.h class and name it GM_Base.

In this GameMode, we will specify our HUD_Base. All other settings can be left as default.
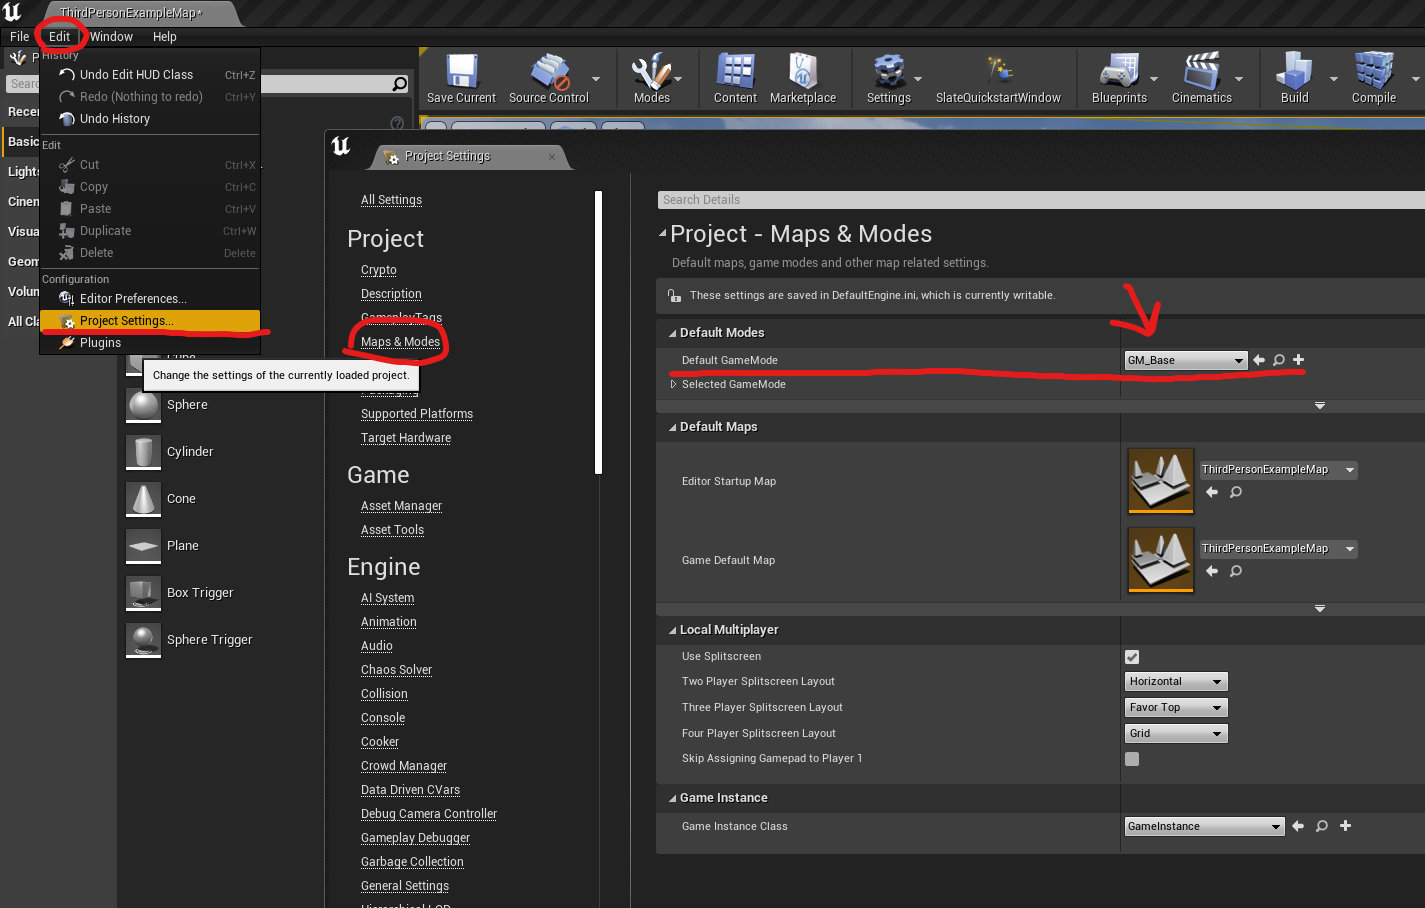
Lastly, set our new GameMode in the project settings.
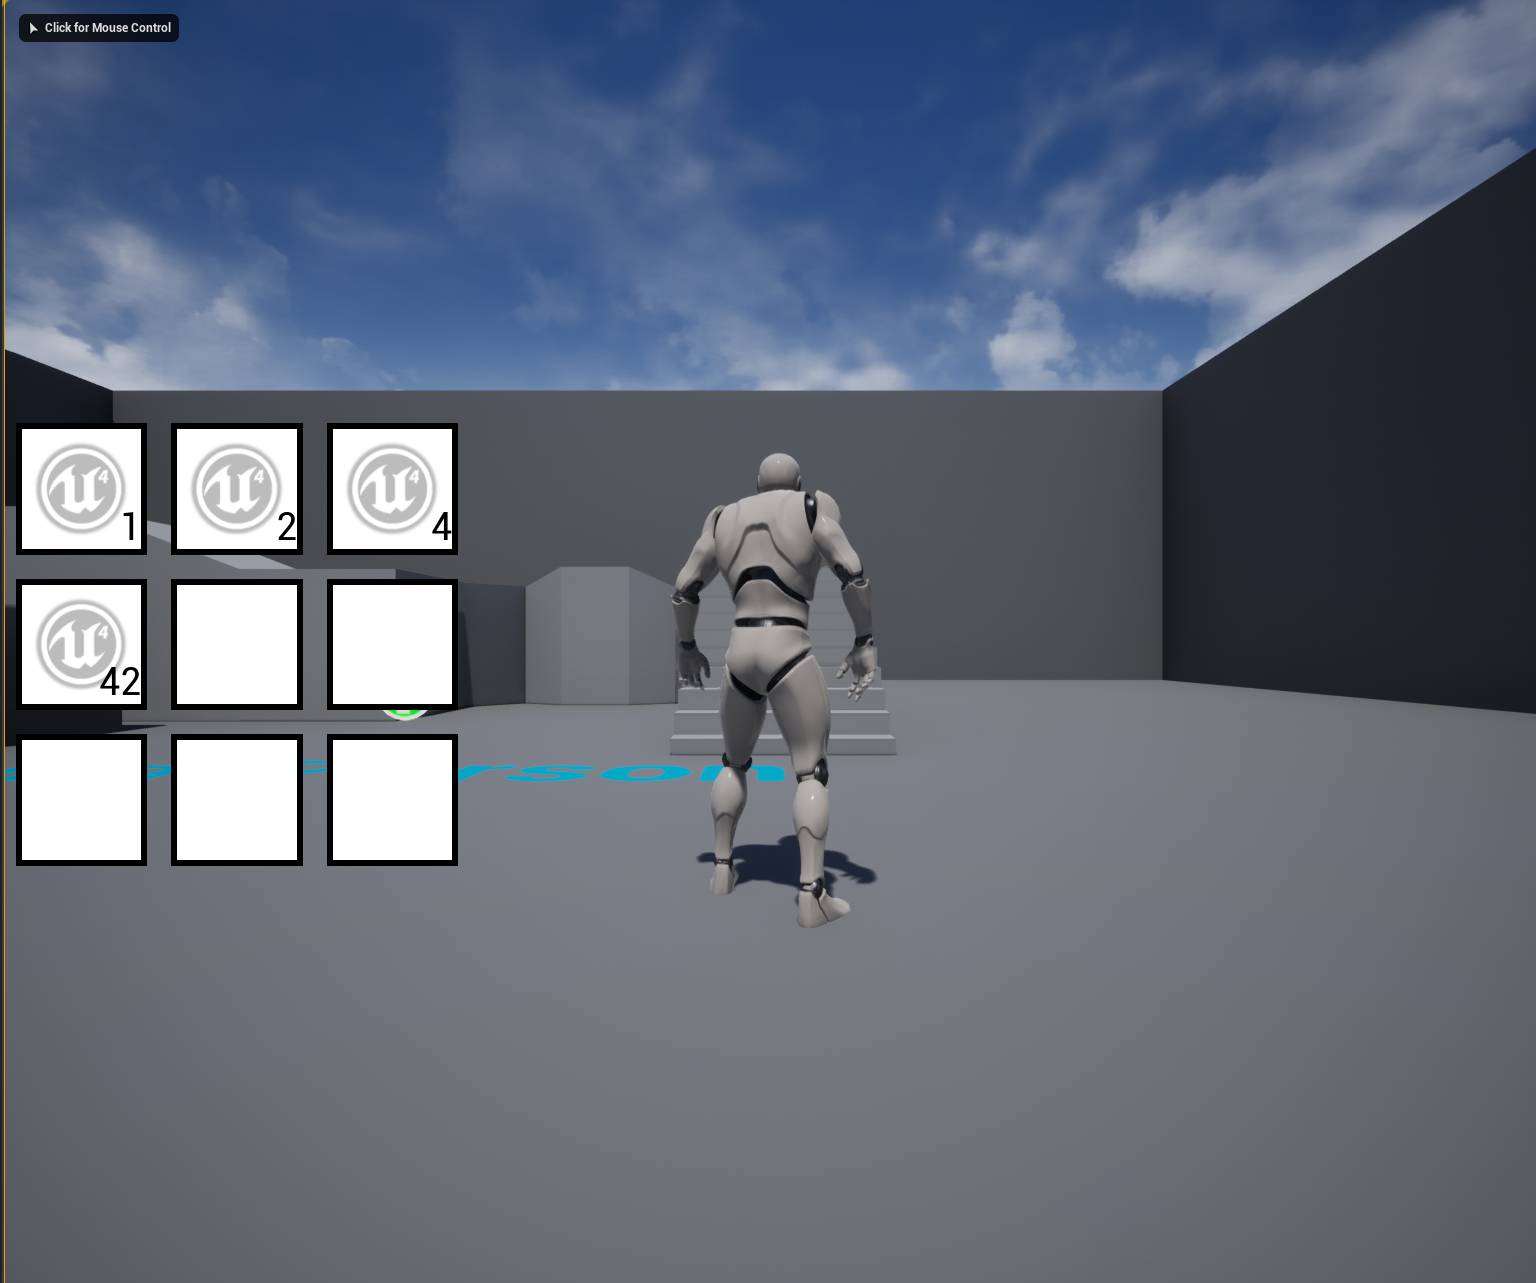
Congratulations, you’ve made it! Now you can run the project, and you should see the inventory with items on the screen.
Conclusion
After this lesson, you will have a good understanding of the capabilities of Slate and how to use it. The hardest part is now behind you; going forward, we will be adding new features, such as handling widget clicks or Drag-and-Drop operations, but the foundation will remain the same.